Friday, December 28, 2012

Serger

Look what I got for Christmas!! SERIOUSLY so excited. I've wanted one forever. My husband earned serious points with this one :)

I hope you all have had an amazing holiday. My family has all been sick this last week and with the holidays I have been taking a little break from sewing. But I'm excited to start again with my new Serger. My mind is going crazy with all of the possibilities. Stay tuned! I hope you are all enjoying some quality time with your sweet families. Happy Holidays!!

Friday, December 21, 2012

Altering a coat

After
Before

My Poor Hubby got dubbed into me putting him on my blog.
He has the hardest time getting the right fit. Which is why he is in a lot my my blog posts. It seems like I am Always altering his clothes.  The poor guy is 6'4 with super long arms. So he need to get XL sometimes XXL so that things are long enough and so that the sleeves are long enough.  However he doesn't need the extra room in the body. Thus, I am altering everything.  He's had this coat for a couple of years but doesn't wear it often because he was self conscious about how big it was.  I was a little more nervous than normal because this is an expensive coat and I didn't want to risk ruining it. But he wasn't wearing it as is so it defiantly needed something. I altered this coat basically the same way I did his shirts here.

I just have him put it on inside out and pin all the way down both sides and half way down the sleeves until its as snug as he wants it.  The difference on the coat, is there are SOOO many layers that I had to lay it out on the ground and make sure it was all pined smoothly. It's almost impossible to pin thru so many layers and have it look smooth while someone is wearing it. But, I did need to have him put it on so I could get the right fit. So I laid it on the ground and repined it checking the front of the coat with each pin to make sure it was laying smoothly. Then once I felt confident that it was pinned smoothly I sewed it. Then I zig zagged to get the secure edge.

 In this case we just left the excess on. In almost every other case we cut off the excess but I wasn't sure how the waterproofing worked and didn't want to mess with it. And it didn't bother him so we left it but I think if you wanted to cut it off you would be ok.
Before
After

Doesn't it look so much better. And he feels more confidant wearing it now so it was totally worth it.

Wednesday, December 19, 2012

maxi skirt

I have made a TON of Maxi Skirts in just about every color. However, I haven't ever been super great about documenting it.  So here you go!

First thing first, Your going to find some stretchy Jersey fabric and get a yard and a half.  It doesn't Have to be Jersey but you are going to want something with a little bit of stretch to it.
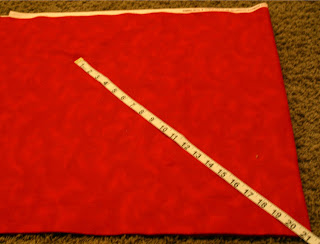
Next you are going to measure your waist. When I say waist I'm meaning where you wear your pants or where you will eventually wear your skirt. Then divide that number by 2 and subtract 1 inch for stretch.  For example if your waist is 30 inches around you will divide it in half so 15 and subtract 1. So this is going to be the top waist measurement. Find the middle of the narrowest part of your fabric (it should still be folded in half just how it came off the bolt) then you are going to measure and pin each side. So that it's centered on the top of the fabric. Make sure you pin through both layers of fabric so you should have 2 pins marking the waist size you need.

Next you are going to measure the length that you need. (sorry for the blurry picture). Just measure from your hip or where you want the top to be all the way to the floor or however long you would like it to be. Then you are going to put your measuring tape at the pin you pinned for the waist and go out diagonally all the way to the edge of the fabric until you have the length that you need and mark it all the way down on both sides. cut along your markings and you'll have a large "A" type shape.


Pin both sides and sew the back and front pieces together.  Hem it. In this case I used my fabulous rolling hem foot so I could get that cool lattice type edge at the bottom. With Jersey fabric you don't have to hem it. I've even seen them at the store un-hemmed. It doesn't fray at all so it's just your personal preference.

Next you are going to attach the elastic. I wanted to use the thicker stuff. You just measure your waist with the elastic stretching it for comfort and cut and sew together. If you are making it for someone else just cut it 2.5 inches smaller then the waist size so it has the right amount of stretch. Then once you've sewn the raw edges of the elastic together you are going to pin it to the right side of the skirt all the way around. Then sew along the top edge.


Once it's sewn flip the elastic out and it should look like this.  Your done.

 The most comfortable skirt in the world. Dress if up, dress it down there are so many ways to wear this baby. No one needs to know its as comfy as PJs :). Once you've made one of these you will want to make more. Trust me :)


Monday, December 17, 2012

MP3 Player case


My 7 year old daughter is all about her music! It cracks me up because she thinks she's so old with her head phones in just bopin away :) When really, it's all Disney music and primary songs on her MP3 player. 

A couple of months ago she dropped her MP3 player for the trillionth time. This time was one time to many and we couldn't get it to turn back on after that.  Ever since she's been asking for a new one.  I found a really great one at ShopKo on black Friday that was way nicer then the one she had. But, it was such a smokin' good deal I couldn't pass it up.  So, after I purchased it I immediately started trying to think of a way we could protect it a little better so that it would have a better fate then the last one.

  I decided the best option was to make a little padded purse just for it.  I didn't want to take it out of the package before Christmas so this picture above just has my cell phone in it which is actually a little bit bigger then the actual MP3 player but you get the general idea.

 I got the dimensions of the MP3 player and traced it on fleece.
Next I found some fun shiny fabric for the front and simply sewed them together with the fleece as the inside piece. 
Then I flipped them inside out so that you can't actually tell there is fleece inside.  Then I sewed on some silver braided stuff for a strap and voila. 

Now hopefully it won't be dropped because it's in a fancy purse. And this way if it is, (which I'm sure it will be) hopefully it's in the case and has a little bit more padding. I hope she likes it. 

My 4 year old isn't quite sure what she modeling (in her PJ's :) ) but she was happy to do it!! She's all about striking a pose whenever she can!

Wednesday, December 12, 2012

Christmas Tie Onsie

Don't you just love the little boy tie onsies? So adorable! I was asked to make a few for a Christmas Boutique.  I decided to make some cute Christmasy ones.  First thing first is cut out a tie shape.  I seriously just eyeballed it.  I simply folded a piece of paper in half and drew half a tie shape and cut it out. Next I did a knot shape and cut that out. Just use that for you pattern and cut it out.
I wanted to do the Santa belt buckle look. So I decided to cut out some black ribbon. I just laid the tie over the ribbon to measure it to make sure I got the right angles and cut it out.  Next I used some gold fabric paint to paint on a buckle. Then wait for it to dry. I let it dry overnight.
Next sew the ribbon to the tie and attach the tie to the onsie.  I simply eyeballed it and pinned it on. Then I did a tight zig zag stitch all the way around to make sure it was nice a secure in place.  So cute and simple.  Love making stuff for little boys since I never get a chance to :)

These are for sale in my Etsy store if anyone is interested. 

Monday, December 10, 2012

Santas circle skirt


Girls just love the circle skirt. My girls call it the spinning skirt because it spins like nobody's business! So easy too!

 All you do, is measure your sweet girl to find the length you need. Next lay out your fabric just how you get it from the store (leave it in half like it came off the bolt.) then fold it over again and measure the length you need.
For example my 7 year old needed 21 inches in length so I measured down & marked it,measured & mark it, again & again until I had an arc shape. Then cut it out following your markings & it will look like this.
Then your going to do the same thing for the waist. I measured 5 inches & did the same thing. Mark it & cut it out. When you unfold it will look like this.
Then all the way & its going to look like this.


Next you can just add elastic to the waist & you have a skirt. In this case I wanted to do a Christmas theme. I added black lace all the way around and added gold fabric paint for a buckle. Then I decided to add white faux fir trim to the bottom.

Wednesday, December 5, 2012

Throw Pillows

 A neighbor friend of mine asked me to make her some throw pillows for her new couch. I was so flattered that she asked me and hope that she doesn't mind me sharing her gorgeous pillows on my blog :) 

 These are the pillows that she had on her previous couch and didn't want them anymore but wanted her new pillows to be the same size.  She wanted a fun pattern for her couch so I had her go ahead and pick up fabric that she liked and that matched the color scheme that she was going for and she brought me this fun bright flowered material.  If you want to make Throw pillows like this one we used 1/2 yard per pillow.  All I did was cut down one side of her existing pillow and pull out the stuffing so we could reuse it in the new pillows.  Next I simply laid it over the new fabric (the new fabric was folded in half or doubled) and traced around it. Make sure you allow for seam allowance.


 In this case she wanted to have a zipper on the one side so the cover could be pulled off and washed if necessary so I left about and inch and a quarter on the side that I wanted to add the zipper to. The next thing I did was add the zipper to the one side then stitch all the way around on the wrong side of the fabric attaching the 2 pieces to each other. I added a zig zag stitch all the way around (except for the side with the zipper) for added support and less fraying. Next I just unzipped the zipper and pulled the fabric thru so it was right side out. Next add the pillow insert or the stuffing if that is what you are using. zip it up and your done.  So cute and fun! Can you believe how crazy expensive throw pillows can be? Now you can just make your own.  Save money and get the perfect type of fabric for your couch! Love it!!


Monday, December 3, 2012

Mens Polo shirt to Adorable Santa Dress

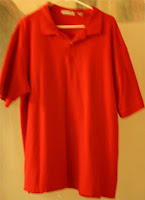
 My husband was throwing out a pile of clothes and I had to snag this red polo knowing I could make something fabulous out of it.  I've seen some cute Santa dresses floating around but there was always something missing. So, I decided to make my own. (Ignore the blurry pictures my camera is not working great today.)

         I decided to make a basic pillowcase dress. I cut the shirt straight across from under the buttons to the armpits. I laid a dress that fit well over the shirt to get the basic shape I needed and cut it out. I cut some basic sleeves to add on and sewed it together.  

Sew down both sides of the dress leaving space for the sleeves. Next attach the sleeves and hem them.  Fold the neck and top edge of the sleeves down 1/2 an inch and sew all the way around leaving a small gap. thread 1/4 elastic thru the fold. I just eyeballed it making sure that wasn't too tight. sew the ends of the elastic together and then sew up the hole. Next I found some fun white faux fur and just cut a strip out and sewed it to the bottom of the dress.  I had a black sash left over from an old project and just sewed it around the middle of the dress.  Next I used gold fabric paint and just painted on a buckle. If you don't have an old shirt you could do the exact same thing with fabric. 

My oldest daughter has already requested a green elf one so I'll post pictures of that one once I get time to make it ;). Feel free to comment if you have any questions.  
So fun for Christmas!! 


If you would rather just purchase one I can custom make one for your little cutie.  They are now available in my etsy store for $25 on sale this week for $15 here or you can just order one directly from me.


Friday, November 30, 2012

Decorating a girls room on a budget

My beautiful girl is growing up. It makes me sad but excited for her! She was moving into our guest room and when I was asking her how she wanted me to decorate it she said she didn't want anything babyish.  We went to Hobby Lobby and found this fun pink and black fabric and I went ahead and got a yard of it not really sure what I would do with it.  She got a big bed and a big dresser that should last her until college. And I wanted to try and decorate it cute but recycle most of her old decorations. 

First I took her old lamp that we got when she was a baby and was covered in dragonflies, and I simply covered it with the cute fabric. I rolled the shade along the fabric to cut the right shape. Next I Modge poged it on. I hot glued the fabric to the inside of the lamp shade both on the top and the bottom to make sure it would stay securely in place.  


Next we got her letters from her room that were white and covered in baby scrapbook paper and recovered it with the fabric as well. First I painted the letters black and then I simply laid the letters over the fabric and traced the size I needed and cut them out.  Then I put modge podge all over the letters laid the fabric on top and modge podged the top .  I wish I had a before picture because they look sooo different.
Next I wanted a large picture for a large wall. When this room was our guest room we had a large picture of a vintage truck on the wall. Seems odd but someone gave my husband the picture and I liked the black frame and white mat. So, I simply took the vintage picture out and modge podged the fabric right on top of it.  Next I found a print that I really liked (I found this picture as a free printable on pintrest) and had it printed as an 8x10 picture.  When it came in I modge podged it to the fabric and that was it.  Don't you love how it turned out.  I'm not sure why its hard to read in this image but it says "if this isn't your castle your not my prince."  I am so happy with it as the main art piece in the room and I love that it is church related but girly at the same time.  

As for the rest of the room we just decorated in matching colors.  I made Black and hot pink pillows for the bed and a hot pink bed spread and pillow shams. It's amazing what you can do with just 1 yard of fabulous fabric! So fun. Now she has a room that she loves now and will hopefully love for many years.

Wednesday, November 28, 2012

Make your own Christmas Decorations

I love this time of year! Decorating for Christmas is so fun and there are so many fun yet simple craft ideas.  Every year my Mom, Sisters and I get together and do a craft night. I love it! Everyone comes up with a craft and bring enough supplies for everyone to do it.

One year my sister Lindsi came up with these cute Bells.  So simple yet fun. Just tie it to a pretty cording. Add berries and a cute bow and that's it. Sometimes less is more and this is one of my favorite Christmas decorations.

 Have you seen these place mat pillows? So simple and fun.  All you do is take a place mat, make sure that the back and the front are 2 different pieces of fabric.  Then you simply un-stitch one side. I only un-stitched it big enough to fit my hand inside, and stuff it full of stuffing. Then once it is as poofy as you want it then just stitch it back up.  You can't find a cheaper pillow and how fun to be able to have throw pillows for every holiday.  You could even do These place mat pillows for everyday use. they really do turn out cute and are so simple.

These Christmas tree towels are so simple and fun. You could even add a ribbon Christmas tree to a t-shirt. All you do is cut several pieces of ribbon at different lengths and sew them on. I used a little piece of brown ribbon for a stump and a little star shaped button for the tree topper.  I also got several pieces of ribbon and gathered it and attached it to the bottom of the towel for added Cuteness. I love how it turned out and people ask me how to make these ALL the time!  So fun and simple.

Monday, November 26, 2012

DIY Necklace

 I love the idea of jewelry making. However... I've tried it and it is just not a talent that I posses. ;) I also hate paying a bunch of money on jewelry, just to have one of my girls break it the first day I wear it. That being said I was beyond thrilled when I saw these gorgeous DIY necklaces at JoAnns.  Since I've been doing it, I've also seen similar types of pieces at Hobby Lobby and even Wal-mart. So keep your eyes out when you are in the DIY jewelry or craft section at your local store.

First you pick out the main necklace piece.
 Next pick out a matching chain or just a chain that you like. And also pick out connecting pieces that you like. 
 Attach the connecter piece to the chain.
 Then attach it to your main jewelry piece.

 Easy as that! I just got 2 of the main parts and use the same chain and connector for both.  Also don't forget to use your 40% off coupons for an even better deal!  I'm so excited about my new discovery!